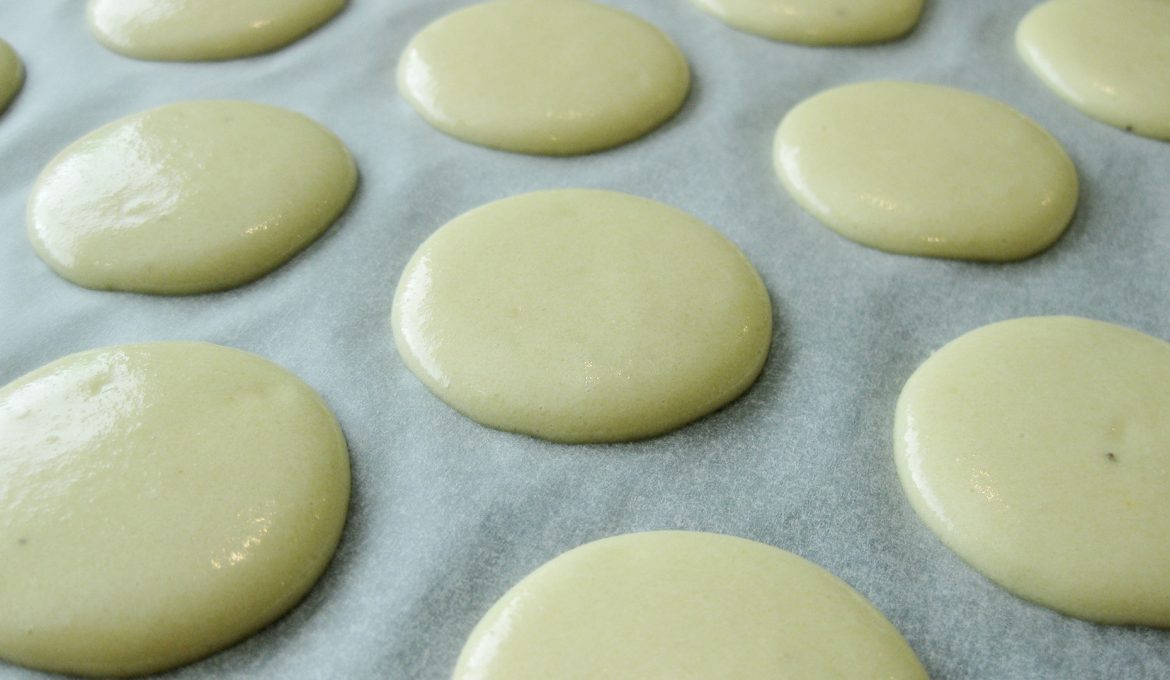
The next topic in “Macarons, Quest for Perfection” is Drying Time. When it comes to resting and drying the macarons, there is a lot of disagreement and confusing information out there. Do we dry them for twenty minutes, thirty minutes, or an hour? Do macarons even need to be rested and dried? There are people out there who stand by the claim that macarons can be piped and put straight into the oven. Through many, many wasted batches of macarons, trying out these varying drying periods—or lack there of—we can say that not only must macaron shells be rested and dried, but they must be dried thoroughly.
The macaron’s signature foot is formed through having a strong skin form on its surface. This skin must dry to a point where they are dry to the touch, be able to glide a finger on the surface of the shell. This will help them withstand the oven and enable lifting of the shell and reveal the batter underneath, creating feet. Not letting them dry or rushing this step will mean cracks on the shells and lack of feet or uneven feet.
The time it takes for macarons shells to develop this skin will depend on your baking environment. How warm and how humid it is in your baking environment (not outside!) will affect the length of time your macaron shells will dry. If your environment is warm and relatively dry, the time it will need to sit out will be shorter. If it is cold and the air is damp (i.e. high humidity) then your macarons will need to sit out for longer. Do not be surprised if your macarons need to rest/dry for triple the time recommended by some recipes, especially if the recipe calls for a short 20 or 30 minutes: even under the best baking environments, macarons don’t dry in such a short drying period.
We have never had any success making a batch of macarons drying for such a short period of time. Others, however, have. Those who have managed to make macarons with little to no drying time, we can only presume that they are either using the Italian Meringue as the base, their oven has some special feature we’re not aware of that allows drying of the shell, or the specific combination of their ingredients allow for no drying time. Curious to see if it was the Italian Meringue or the combination of ingredients that permitted macarons to not need any drying time, we went in search of, firstly, a recipe using the French Meringue that maintains the “no drying needed” stance, then we searched for a recipe using the Italian Meringue.

With the recipe that used the French Meringue and no drying time, there were a number of differences from the recipe we normally used. In terms of the ingredients list, there was the addition of salt. (In a basic macaron recipe, it consists of only egg whites, ground almonds, icing sugar and caster sugar). It asked for egg whites from any type of egg as opposed to the commonly asked, ‘aged egg whites’ and they must be whipped to a very stiff meringue. In regards to proportions, there was slightly less sugar in the meringue and less ground almonds to one egg white.
A technique it employed that we normally didn’t employ is the rapping of the trays several times. After piping, it asks us to rap it hard on the countertop so that air bubbles are rid of and do not rise to the top during baking and cause cracks. We’ve never had to rap our baking sheets; we only give light taps under the baking sheet. If you have the perfect batter consistency, light taps is all you need—if at all. And we’ve never found air bubbles on the surface to be the cause of cracks: if macarons are left to dry, air bubbles that surface during the drying process will not cause major aesthetic problems to your macaron shells. So, the fact that this recipe was asking us to basically slam the sheet down onto the table for that reason was quite surprising to us.
The last difference, it instructs us to put it straight into the oven at 300°F (148.9°C) and bake for around 18 minutes.
The result was not good, to say the least. The shells were fine up until the five-minute mark. Thereafter, they began to strain against the oven heat. They puffed up and out, they became porous, fissures appeared. There was no foot of any kind on any of them. By the ten-minute mark, we decided to switch our oven off. They had turned out as we had expected them to. They progressed exactly like our very first batch of macarons when we made the mistake of drying them not long enough. So, there was no point in continuing to waste electricity on this batch.
Predicting that the batch would go the way of feetless and porous macaron shells, we had piped three macaron shells from the same batter on another baking tray to test how they’d perform if we dried them. We didn’t dry them till they were touch-dry, though; we only dried them to the point where we could touch the rim and no batter stuck to the finger. We figured a short drying time of about 30 minutes should be more than enough drying time for a recipe not asking for any drying time. And the result was that there was improvement: there were feet this time, but the shells did crack. Nevertheless, they did look like macaron shells.
We moved onto testing our next theory about macarons using the Italian Meringue base as not needing drying time. We found a recipe and tried not drying them. We can say they went the same way as the previous recipe that didn’t call for a drying period.
From these two failed batches and semi-success with the one we dried for a short period, we conclude macarons do need to dry. Having made many successful batches before, we know our failures were not due to poor technique: we know how to spot the perfect batter consistency. We know it wasn’t the weighing of ingredients since we use a digital scale and made sure it is accurately calibrated. The only other variable we may need to consider is our oven. The writer of the recipe did not give information on the oven they use, how it operates, or if temperature was kept consistent throughout the baking time. We also can’t help to wonder if there is an oven that has some special feature or operates in a way that allows skin to form on the shells whilst they baked—because—skin absolutely needs to be there in order for lifting to occur so feet forms. Maybe the oven was the difference between us succeeding with their recipe and failing.

Whether the oven played a part or not, to reduce the undesirable result of macaron shells expand up and outwards, crack and remain feetless, make sure you dry the macarons. This step is time-consuming, but this step is necessary. Dry them thoroughly, until it is touch-dry and your finger can glide right across the surface of the shells. This will give the macaron shells a good chance of developing feet and keep the shells from cracking under the oven heat.
See our other posts in Macarons, Quest for Perfection blog series:
Macarons, Quest for Perfection – Recipe, Method, Environment and Equipment
Macarons, Quest for Perfection – Technique, Macaronnage
Macarons, Quest for Perfection – Oven
Macarons, Quest for Perfection – Italian Meringue Method vs. French Meringue Method
ADVERTISEMENT


This is very interesting. I have been experimenting with quicker ways to dry my macarons– and you are right– a humid day it can take hours. I once dried a tray for 5 hours before I got the “pet with my finger” skin! Whew. You mentioned in several posts that you tried a dehumidifier. I was curious if it made the “skin forming” process any quicker?
Thank you!
@Emilie The dehumidifier we tried with wasn’t very powerful, so we didn’t find it any quicker in drying the macaron shells. However, we would think a more powerful dehumidifier or something that could make the environment less humid, the macaron shells would form that skin faster.